Having trouble drawings rooms? Try this method!
Posted On: May 14, 2014 22:24:18 GMT
Shain, twocue, and 2 more like this
Post by Mail on May 14, 2014 22:24:18 GMT
Firstly i'd suggest you read up on 1-point and 2-point perspective, if you've never heard of those terms before! Knowing how to use those comes in handy a lot for using this method.
Of course, you can draw scenes simply using those, but this is a method I heard about (i'm trying to locate the original source) that makes it easier to place objects inside a location. I decided to give it a try and I think it's pretty neat!
I really suggest trying this out because it just might work for you as well.
To repeat once again, I didn't make this method. I only heard about it.
Step 1: The Layout
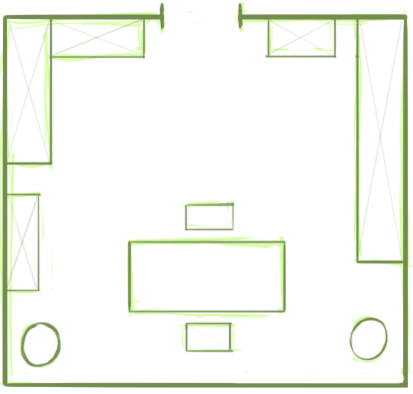
So have you ever seen a floor plan? You basically start off with that! This helps you get your room shape down, as well as the placement, size, and direction of objects within it. It's especially handy for looking at how they interact with the room walls.
This is what I drew up, just to give you an idea. Simple shapes, but you can label stuff or do whatever you wish to keep the shapes it sorted.
Step 2: Transform
I'm using Adobe Photoshop CS6, but any program will do as long as it has the transform or free transform tool.
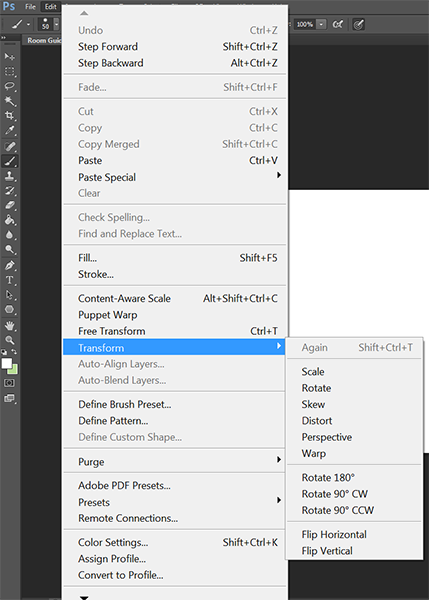
Just go to Edit > Transform then play around with the Scale, Rotate, Skew, Distort, Perspective, or Warp to get the desired result based on the direction and way you want your room to look!
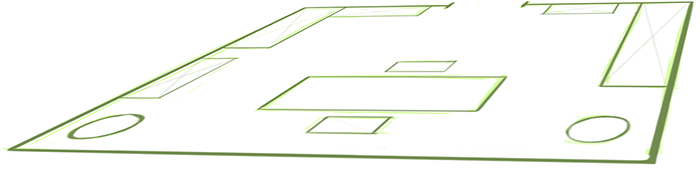
In my specific instance, I got it to look something like this!
Step 3: Extend the Lines
After you made your floor plan look more like a 3D
space, all you have to do is extend the corners and lines up to start giving your objects some shape. Give yourself plenty of drawing space!

And that's about it!
Make sure you keep in mind the walls and which objects overlap each other in your perspective. Sketch over it and make it look nice and fancy. Have fun!
Of course, you can draw scenes simply using those, but this is a method I heard about (i'm trying to locate the original source) that makes it easier to place objects inside a location. I decided to give it a try and I think it's pretty neat!
I really suggest trying this out because it just might work for you as well.
To repeat once again, I didn't make this method. I only heard about it.
Step 1: The Layout
So have you ever seen a floor plan? You basically start off with that! This helps you get your room shape down, as well as the placement, size, and direction of objects within it. It's especially handy for looking at how they interact with the room walls.
This is what I drew up, just to give you an idea. Simple shapes, but you can label stuff or do whatever you wish to keep the shapes it sorted.
Step 2: Transform
I'm using Adobe Photoshop CS6, but any program will do as long as it has the transform or free transform tool.
Just go to Edit > Transform then play around with the Scale, Rotate, Skew, Distort, Perspective, or Warp to get the desired result based on the direction and way you want your room to look!
In my specific instance, I got it to look something like this!
Step 3: Extend the Lines
After you made your floor plan look more like a 3D
space, all you have to do is extend the corners and lines up to start giving your objects some shape. Give yourself plenty of drawing space!
And that's about it!
Make sure you keep in mind the walls and which objects overlap each other in your perspective. Sketch over it and make it look nice and fancy. Have fun!